

PLEASE NOTE:
I'm currently not taking orders for a while. Email me at derek@pondbuster.com if you have any questions.
Good luck on the water!
![]()
I'm currently not selling these crankbaits... I'm having too much fun making them and of course, testing them. I'll be selling a select few in the near future.
![]()
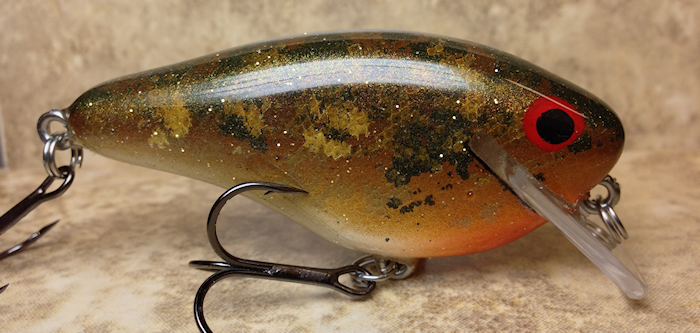
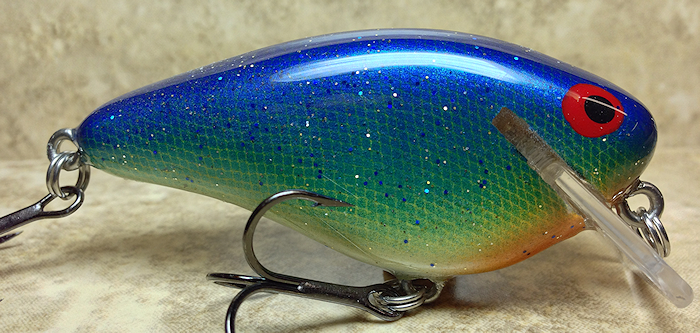
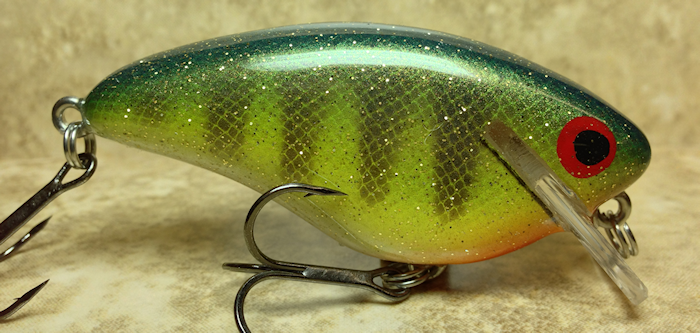
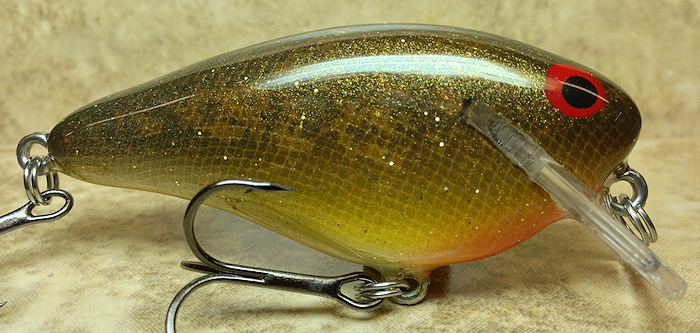
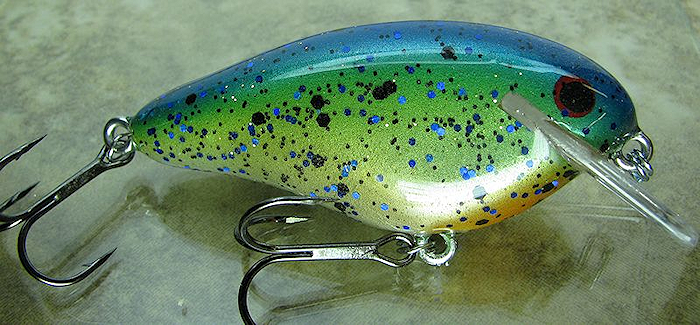
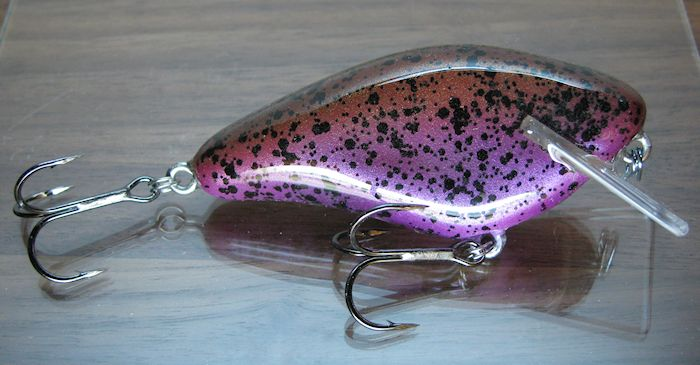
New colors for 2013...
|
Ugly Gill |
True Blue |
|
Faded Perch |
Golden Gill |
|
Green Gill |
Green Perch |
|
Golden Perch |
Iowa Gill |
2012 Colors...
|
Rude Bee |
Say Fire |
|
Quila Sunrise |
Grape Shad |
|
Stewgill |
Black Gold |
|
Green Perch |
Brown Back Green Frog |
|
Splattered Sunfish |
Green Magic |
|
Blue Sparkle |
Joker |
|
Golden Green Sunfish |
Yeller Belly Sunfish |
|
Golden Gill |
Green Reaper |
|
Joker 2 |
Mud Mucker |
|
Green Sunfish |


I started building balsa crankbaits by watching videos online of how other guys build them. It all goes back to when I started fly tying - catching a fish on something I made myself is about as good as it gets. I started making a few one at a time, but then I got addicted to making more and experimenting with different patterns and colors.
Below is step by step details of how I build the DB's Triple B balsa crankbaits. I've made a few other body shapes and plan on making other styles eventually, but I like the design and action of this bait, so I decided to see if I could make quite a few of them. With every crankbait I build and especially paint, the better they get, so I figured it couldn't hurt to practice.
I usually get two questions from everybody - how long does it take to build one of these and how much are they? The first one, how long does it take, is tough to figure out. Basically it takes about a week to complete one bait from start to finish. I make several at a time, which doesn't really cut down on time, but it does make it easier to go from step to step. In a nutshell - it takes a very long time to build one of these crankbaits.
As for how much - I'm still working out how much I could take to part with these baits. The amount of time that goes into each bait is hard to put a price on. I often think of a price and think to myself that I'd rather just have it in my tacklebox than give it up for that price. I see custom balsa baits sold online anywhere around $10 a piece all the way up to $90 per lure. I also see a lot of guys building quality baits and only selling them occasionally or to select customers. I can see the quality problems as well as how boring some lures have been designed. A lot of people build their baits with premade balsa blanks, precut bills, and many other components that anyone can go out and buy.
I can tell you that my baits are like no other. I don't consider my crankbaits the best of the best, but they do look better than most and are completely unique compared to any other baits people are selling out there. Fishing balsa baits is a great way to present something different, so I can't stand seeing people pay crazy prices for the same ol' same ol' lure. You may pay the same crazy prices, but by using my crankbaits, you'll know that you are the only person on the lake throwing one of these.
Step 1 - Preparing and Carving the Balsa
 The first step in the long process of
building a balsa crankbait is preparing the balsa. When I
first started, I simply used a pattern drawn on a piece of
balsa, a Dremel tool, and a lot of sanding. Then came the
Copy Carver that my dad built for me. I started with a template
that I carved out of basswood. I made a clamping system
for the copy
carver
that holds the balsa down firmly. I do waste a little bit
of balsa in the process, but it works really well, so I'm
sticking with it for now.
The first step in the long process of
building a balsa crankbait is preparing the balsa. When I
first started, I simply used a pattern drawn on a piece of
balsa, a Dremel tool, and a lot of sanding. Then came the
Copy Carver that my dad built for me. I started with a template
that I carved out of basswood. I made a clamping system
for the copy
carver
that holds the balsa down firmly. I do waste a little bit
of balsa in the process, but it works really well, so I'm
sticking with it for now.
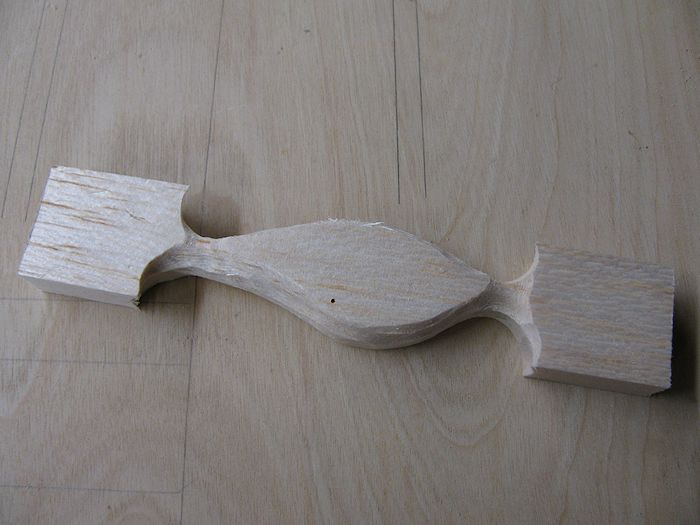
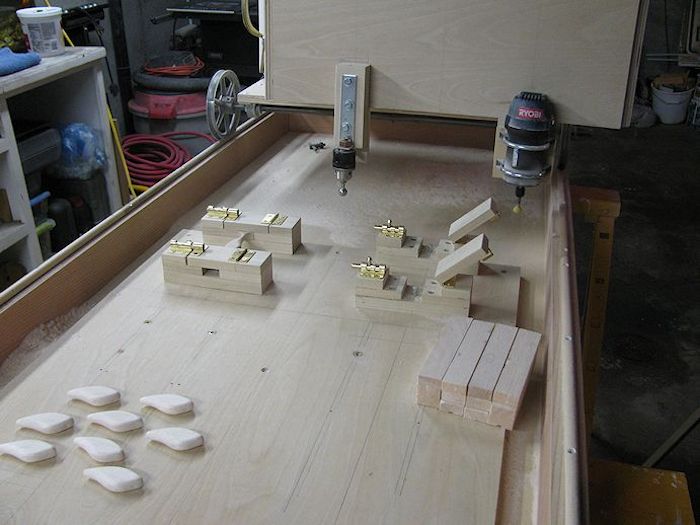 I cut a piece of balsa, drill a hole
down the center of it and glue in a poplar dowel before the bait
is carved. The poplar dowel is so the front and rear screw
eyes can be glued and screwed in. A lot of balsa baits are
made with a wire frame, but I've found that the poplar dowel
trick I came up with is far easier and it also helps balance the
bait. Below is a video of me carving out a single bait
using the copy carver. The video is loud, and yes, I was
wearing hearing protection, safety glasses, and a dust
respirator.
I cut a piece of balsa, drill a hole
down the center of it and glue in a poplar dowel before the bait
is carved. The poplar dowel is so the front and rear screw
eyes can be glued and screwed in. A lot of balsa baits are
made with a wire frame, but I've found that the poplar dowel
trick I came up with is far easier and it also helps balance the
bait. Below is a video of me carving out a single bait
using the copy carver. The video is loud, and yes, I was
wearing hearing protection, safety glasses, and a dust
respirator.
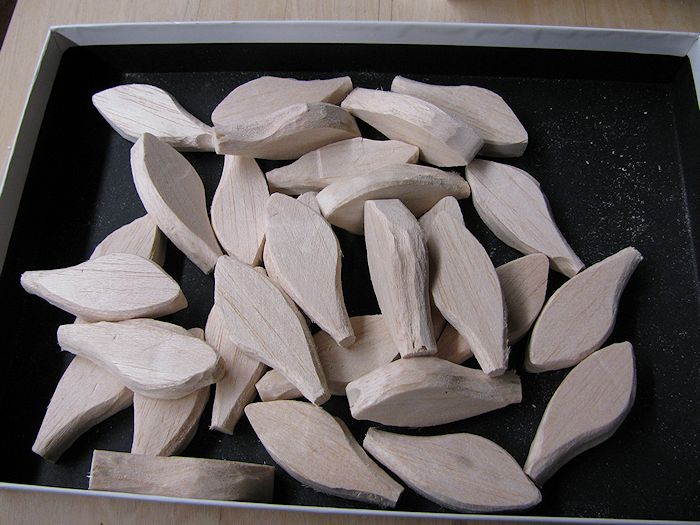 It
usually takes 3-5 minutes to carve each bait, quicker if I do
several at a time. From a stack of 30 prepared blocks of
balsa to this photo of 30 roughly carved and trimmed baits took
just about an hour and a half. The finished product out of the copy
carver is very rough, but it allows me to sand it perfectly.
This photo shows about 30 crankbaits I carved with the copy
carver and trimmed with a scroll saw. You'll notice how
rough the baits look - balsa is so soft, it doesn't take much to
shape it the way I want it.
It
usually takes 3-5 minutes to carve each bait, quicker if I do
several at a time. From a stack of 30 prepared blocks of
balsa to this photo of 30 roughly carved and trimmed baits took
just about an hour and a half. The finished product out of the copy
carver is very rough, but it allows me to sand it perfectly.
This photo shows about 30 crankbaits I carved with the copy
carver and trimmed with a scroll saw. You'll notice how
rough the baits look - balsa is so soft, it doesn't take much to
shape it the way I want it.
Step 2 - Sanding, Sanding Some More, and More Sanding
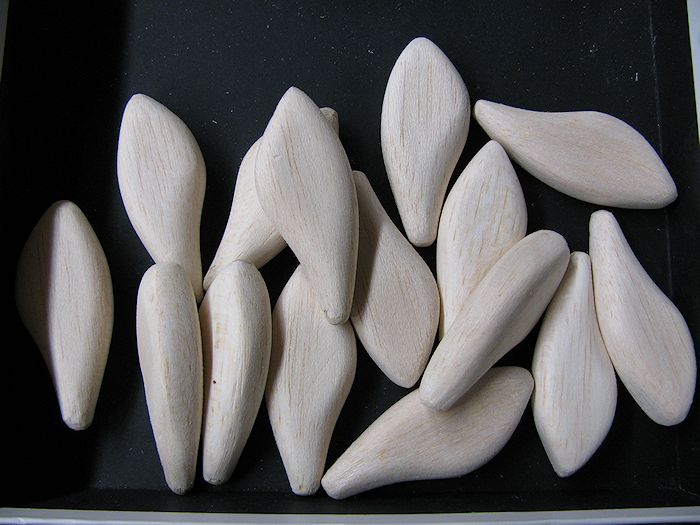 No
telling how long it takes to sand each bait, but sanding is
probably the most time consuming part of the entire process. I
go over each bait with 60-grit sandpaper to shape it better,
followed by a round of 100-grit, 150-grit, and 220-grit. Each
bait is pretty much identical, but no two are ever the exact
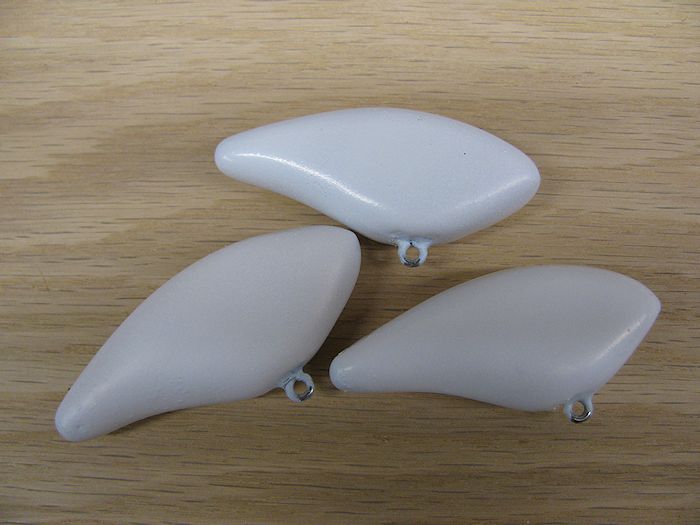
same. The photo here shows some of the same baits after being
sanded. I haven't figured out a system to making the sanding
part go quicker, but since I'm a perfectionist, it's probably
better I take the time with each bait. I've played around
with sanding it even smoother, but the first round of sealing
the bait fills in any imperfections.
No
telling how long it takes to sand each bait, but sanding is
probably the most time consuming part of the entire process. I
go over each bait with 60-grit sandpaper to shape it better,
followed by a round of 100-grit, 150-grit, and 220-grit. Each
bait is pretty much identical, but no two are ever the exact
same. The photo here shows some of the same baits after being
sanded. I haven't figured out a system to making the sanding
part go quicker, but since I'm a perfectionist, it's probably
better I take the time with each bait. I've played around
with sanding it even smoother, but the first round of sealing
the bait fills in any imperfections.
Step 3 - Drilling and Inserting Belly Weight
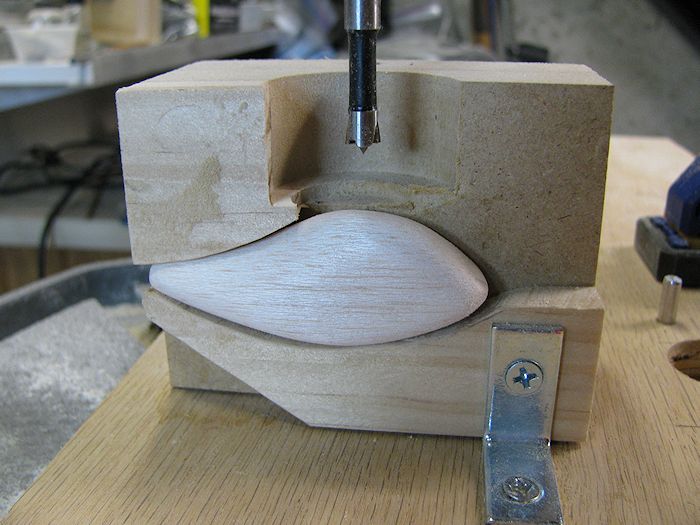 The
next step is to drill a hole for the belly weights and bottom
screw eye. I made a jig to hold each bait so I can drill
each hole perfectly. Because each bait is slightly
different, this jig allows me to hold the bait by hand and
pretty much eyeball it perfectly centered. Balsa baits
have a lot more action than cedar or other woods, and they float
much higher, so the placement of the belly weight is very
forgiving when the final crankbait is complete.
The
next step is to drill a hole for the belly weights and bottom
screw eye. I made a jig to hold each bait so I can drill
each hole perfectly. Because each bait is slightly
different, this jig allows me to hold the bait by hand and
pretty much eyeball it perfectly centered. Balsa baits
have a lot more action than cedar or other woods, and they float
much higher, so the placement of the belly weight is very
forgiving when the final crankbait is complete.
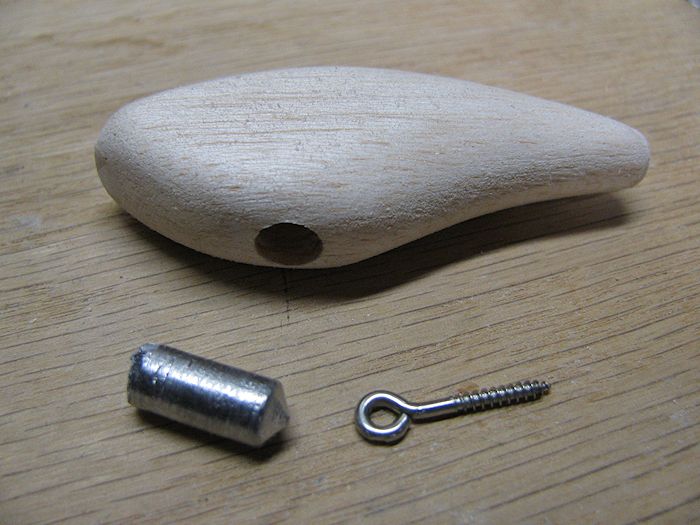 I
pour my own lead belly weights, then a hole is drilled in the lead
and the screw eye is inserted before it's glued into the bait.
There was a lot of trial and error in this part - at first I
glued in the belly weight, then drilled a hole for the screw eye
using the same jig. This worked for most of the baits, but
occasionally the drill bit would catch while drilling the lead,
and rip the belly weight loose from the balsa. The new
system was perfected by my dad when he built a jig to hold the
belly weights, the pilot hole is drilled in each one and
I
pour my own lead belly weights, then a hole is drilled in the lead
and the screw eye is inserted before it's glued into the bait.
There was a lot of trial and error in this part - at first I
glued in the belly weight, then drilled a hole for the screw eye
using the same jig. This worked for most of the baits, but
occasionally the drill bit would catch while drilling the lead,
and rip the belly weight loose from the balsa. The new
system was perfected by my dad when he built a jig to hold the
belly weights, the pilot hole is drilled in each one and
 the
screw eye is put into the lead before the entire weight and
screw eye is glued into
the bait.
the
screw eye is put into the lead before the entire weight and
screw eye is glued into
the bait.
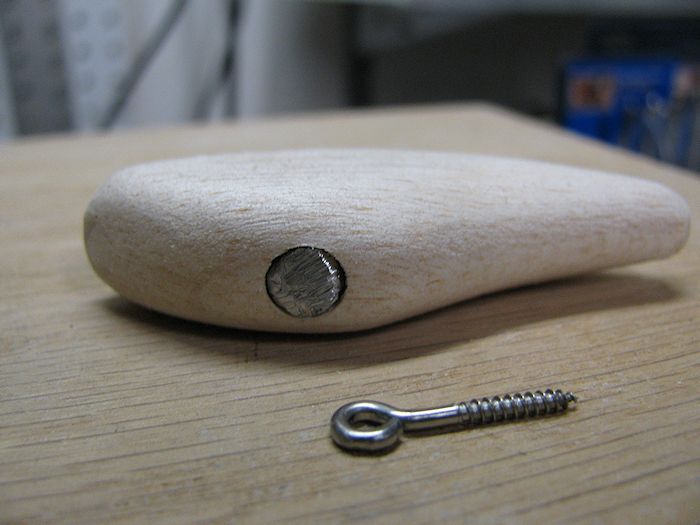
The photo on the right shows how I built them before the belly weight jig, but it shows that the hole is slightly bigger than the weight, which allows for enough room for the glue. The belly weight is glued in and sealed using a two-part epoxy.
Step 4 - Sealing the Bait (the first time)
After the belly weight with the bottom screw eye is in, I seal the entire bait. In the beginning when I first experimented with making balsa baits, I didn't do a great job with the sealing part. If just a drop of water hits the balsa part of a the bait, it causes all sorts of problems - cracks, bubbled finish coat, and the entire bait can quickly act differently and go completely out of tune.
 I
currently seal the baits with several coats
of a 2-part urethane and 2-part epoxy. I've experimented
with cutting the bill slot and inserting the bill and other
screw eyes before sealing it, but in the end, it's a lot of work
to keep the paint off the bill and screw eyes - so for now, I'm
sealing the bait before paint and hardware, and then sealing
again later when the crankbait is complete. After sealing
the bait with the urethane and epoxy, a white primer is
airbrushed onto the bait.
I
currently seal the baits with several coats
of a 2-part urethane and 2-part epoxy. I've experimented
with cutting the bill slot and inserting the bill and other
screw eyes before sealing it, but in the end, it's a lot of work
to keep the paint off the bill and screw eyes - so for now, I'm
sealing the bait before paint and hardware, and then sealing
again later when the crankbait is complete. After sealing
the bait with the urethane and epoxy, a white primer is
airbrushed onto the bait.
Step 5 - Painting (the fun part)
 Painting
the pattern and colors on the bait is absolutely the funnest
part of the whole tedious process of builing a custom crankbait.
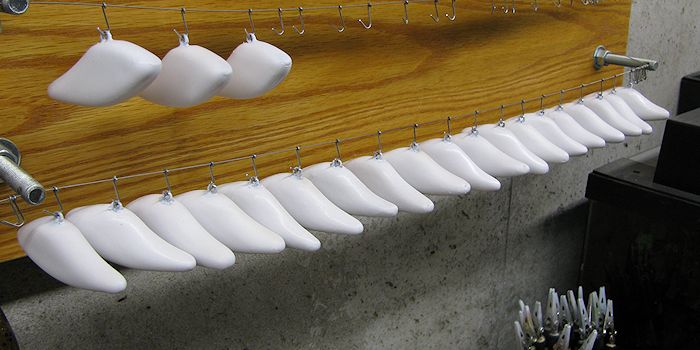
The photo on the right shows about 20 some primed and ready to
paint baits.
Painting
the pattern and colors on the bait is absolutely the funnest
part of the whole tedious process of builing a custom crankbait.
The photo on the right shows about 20 some primed and ready to
paint baits.
I still consider myself a beginner when it comes to airbrushing, but with each one I paint, the better I get. I have figured out the secret to airbrushing cool looking crankbaits - use a lot of different colors in each bait. Subtle colors and transitions turn a boring pattern into an eye catcher. I'm not saying my patterns are perfect or anywhere close to being the best, but there a lot of really boring crankbait colors out there.
 Some of the patterns I paint have scaled patterns which I use a
variety of materials to create the scale pattern. I've
experimented with aluminum window screening, fine bridal veil
material, bath sponges, and other types of mesh material.
So far, I've found that a circular sewing clamp with aluminum
window screening works the best. It makes a small pattern
and the aluminum is rigid enough to easily keep in place while
painting the scale pattern.
Some of the patterns I paint have scaled patterns which I use a
variety of materials to create the scale pattern. I've
experimented with aluminum window screening, fine bridal veil
material, bath sponges, and other types of mesh material.
So far, I've found that a circular sewing clamp with aluminum
window screening works the best. It makes a small pattern
and the aluminum is rigid enough to easily keep in place while
painting the scale pattern.
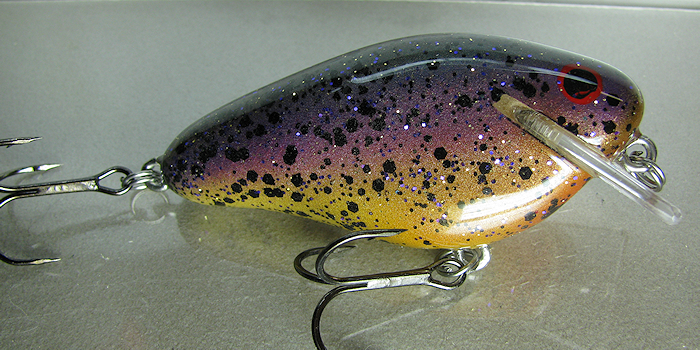
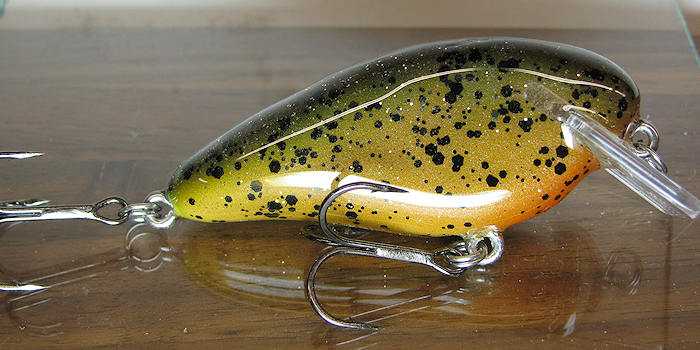
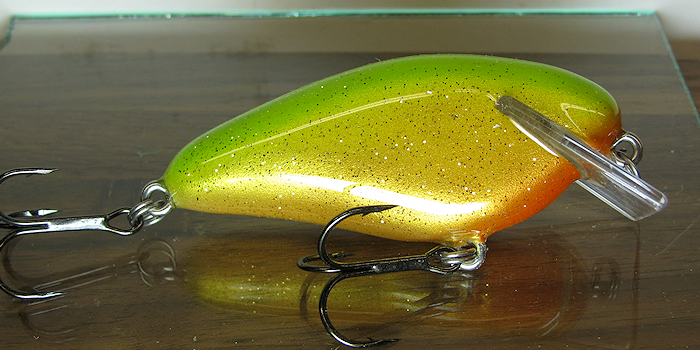
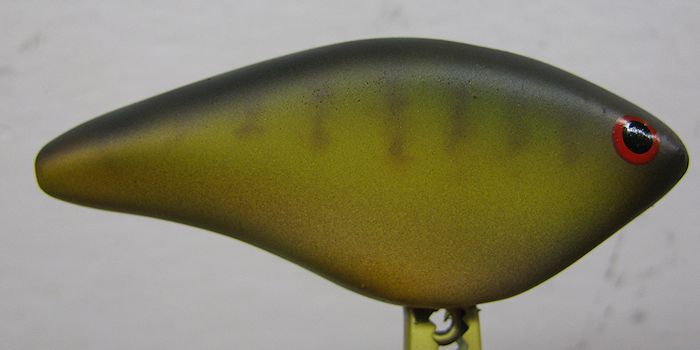 The
photo on the right is a very simple pattern before any finish
coat has been applied. The eyes are dotted on using
different size drill bits dipped in paint. I've played
around with 3D eyes and stickers, but painting them on is just
as easy and look good.
The
photo on the right is a very simple pattern before any finish
coat has been applied. The eyes are dotted on using
different size drill bits dipped in paint. I've played
around with 3D eyes and stickers, but painting them on is just
as easy and look good.
I own several different airbrushes and I've found that you definitely get what you pay for when it comes to airbrush quality. A small diameter needle (3 mm or 2 mm) with quality paint creates the best paint job. The photo above was painted with a very cheap airbrush - the lines are decent, but not great.
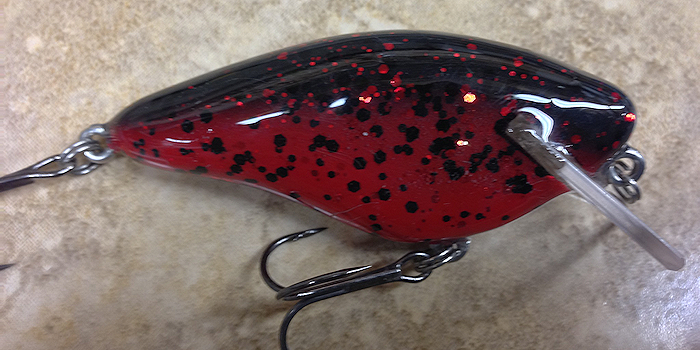
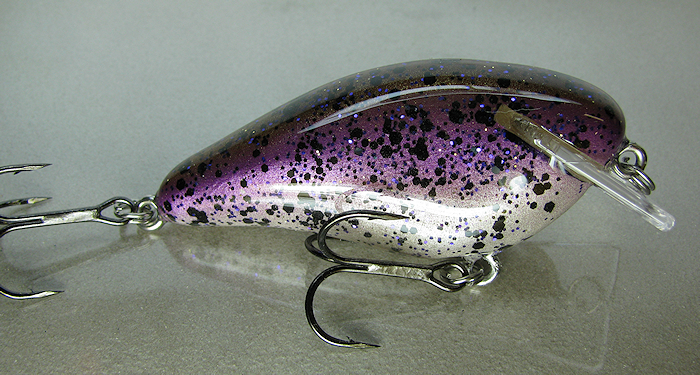
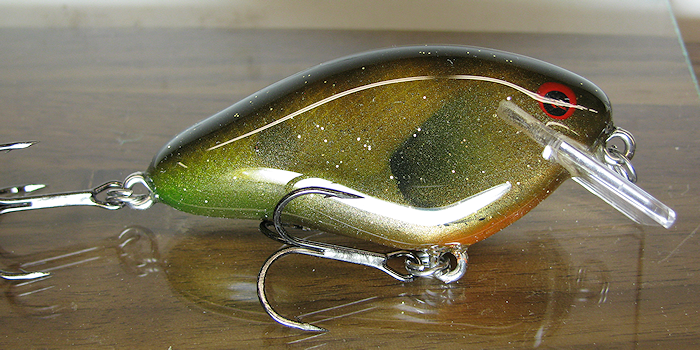
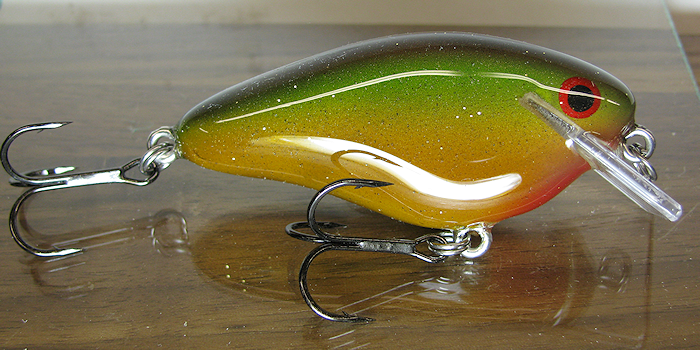
Step 6 - Finish Coat #1
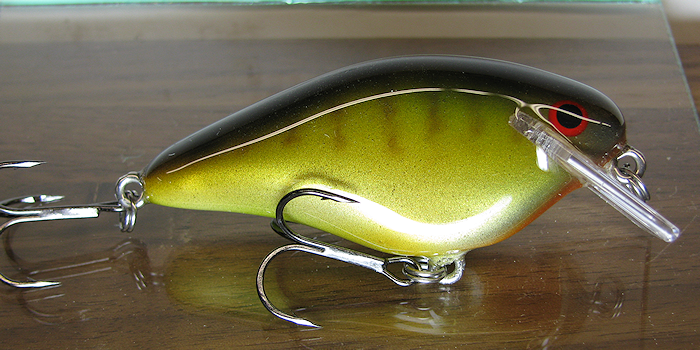 After the color and patterns are applied, I put another round of
finish on the bait. The painted lure looks great after painting,
but totally comes alive with a good coat of glossy finish. You
can see the difference the finish coat makes by looking at this
photo of a completely finished bait and comparing it to the
photo of the same bait shown above.
After the color and patterns are applied, I put another round of
finish on the bait. The painted lure looks great after painting,
but totally comes alive with a good coat of glossy finish. You
can see the difference the finish coat makes by looking at this
photo of a completely finished bait and comparing it to the
photo of the same bait shown above.
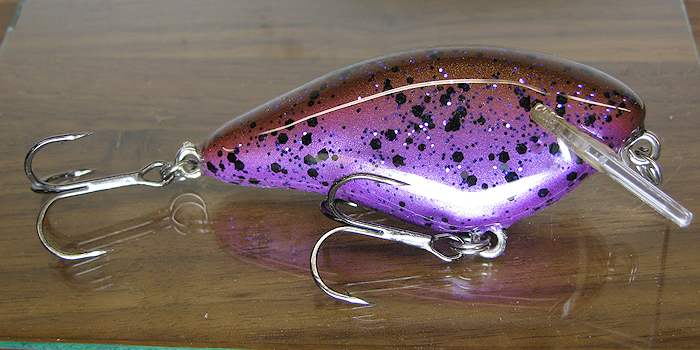
I often use flake mixed in with the first finish coat of either 2-part urethane or 2-part epoxy. The flake gives a very unique and irregular look, plus some of the flake like gold and silver makes the bait far more attractive to both the angler and the bass.
I've experimented with many different products for a finish coat - 5 minute epoxy, Devcon 2-ton epoxy, automotive clear coats, and various urethanes. For now, Devcon 2-ton epoxy seems to be the most reliable, durable, and waterproof. I will probably keep experimenting with as many different finish coats until I find something that works absolutely the best. I apply the 2-ton epoxy with disposable paint brushes that I buy in 30 packs at Walmart for a few bucks. I also use a decent 2-part urethane, but requires a lot of very thin coats to get a smooth glossy coat. The urethane also brings along a whole issue of fumes and wearing a lot of eye and breathing protection when applying it.
Step 7 - Attaching the Bill
After the first finish coat has cured - days rather than hours - I cut the slot for the bill. I previously just used a template and a scroll saw to cut the slot. Early in 2014, I finally decided to think it out and come up with a jig to cut the bill slot on a table saw. I've also began to put the bills in before painting and tape off the bill before painting. The newer baits I have on my website are the ones that have a more finished baits on the side of the bait without the bill showing on the side as much.
I have a short YouTube video showing the jig I built to cut the bill slot at http://youtu.be/o4URJnjozoc if you're interested in seeing what it looks like. A lot of thought and planning went into this jig. What the video does not show is the small slot cut to accomidate the bottom screw eye and foam padding on the small fence where the fence pushes the flat side of the bait.
fter the slot is cut, I use a 2-part epoxy to coat the entire inside of the slot and insert the bill. The bills are cut from Lexan and polished with a horizontal polishing wheel. I have these custom done by a glass shop and have proven to be extremely durable and look great. I could use a thinner bill - but the thicker Lexan makes a much bigger thump on anything it hits, which most bass anglers know attract more strikes.
Step 8 - Final Finish Coat - Sealing the Bait
After the bill is attached, I then attach the remaining two screw eyes (front and rear). I use an Xacto knife by hand and use a drilling motion to penetrate the finish coat without chipping or cracking the finish. I then use either a needle or a very small diameter drill bit to drill the holes for the screw eyes. The screw eyes are screwed in, removed, and then epoxied back in.
After the screw eyes are on, I seal the bait at least one more time to seal up the entire bait even more. I often feel that I might be putting too many coats of finish on the baits, but I figure the more the better and each coat makes the bait look even better and become more durable.
Step 9 - Attaching the Hardware and Tuning the Bait
After the final coat of finish has dried for several days, I attach split rings and hooks. I have used many different types and sizes of hooks. The hooks I currently use on these baits are #4 VMC wide gap treble hooks. VMC makes a high quality, sharp and extremely durable hook. The #4 hooks fit perfectly on these baits - the two hooks barely touch either and do not get hung up with each other.
Tuning the bait is tricky, but easy. It's amazing how a crankbait comes together at this point and any imperfections or slight issues of bill or screw eye placement can be fixed with a simple bend of the front screw eye.
Step 10 - Fishing with the Bait
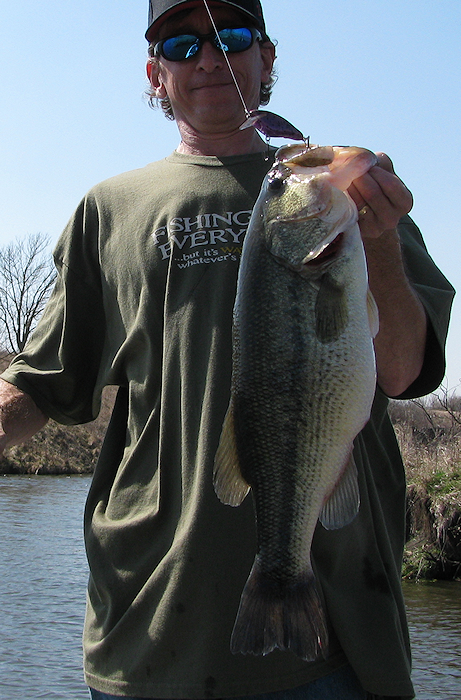 The
very first time I actually tested these baits was on a very
early spring day in Missouri. I took several different
patterns, planning on spending quite a while tying knots and
tuning the baits. It was a rough day fishing for everyone
fishing, but I managed to catch a small one on a Green Sunfish
pattern, so I figured I was onto something as far as the baits
actually working. Later that day, I managed to catch the
largest bass I've caught in a while on the Joker color. The bass weighed in at 6.5 pounds and the bait
held up like a champ.
The
very first time I actually tested these baits was on a very
early spring day in Missouri. I took several different
patterns, planning on spending quite a while tying knots and
tuning the baits. It was a rough day fishing for everyone
fishing, but I managed to catch a small one on a Green Sunfish
pattern, so I figured I was onto something as far as the baits
actually working. Later that day, I managed to catch the
largest bass I've caught in a while on the Joker color. The bass weighed in at 6.5 pounds and the bait
held up like a champ.
I was a little worried about the first testing session, since I've read and heard about other people building balsa baits where the finishes leak, hook eyes pull out, and other problems. Out of the 20 some lures I tested that first time, only one didn't perform well - the very first one I built, which did not contain the poplar. The hook eye tore out - and I'm glad the 6 1/2 pounder was caught on one that did have the poplar included. The finish did get a few small scratches from the larger bass, but I couldn't be happier with the performance. I can't wait to see what these baits do on a good day of fishing (especially in a tournament setting). I'll try to get some pictures or video of the crankbaits in action - it's not easy to drop the rod, hand over a bait to someone else, and pickup a camera.
Like I said before, I'm still trying to figure out a price that would lure me into parting with any of these baits. If you have any questions or want to make me an offer, please feel free to email me at derek@pondbuster.com. Honestly, after fishing with these baits I probably woudn't part with one for less than $50 - so please, serious inquiries only.
![]()

|
Total Order Amount |
Shipping |
|
Up to $50.00 |
$8.95 |
|
$50.01 - $75.00 |
$10.95 |
|
$75.01 - $100.00 |
$12.95 |
|
$100.01 - $150.00 |
$14.95 |
|
Over $150.00 |
$16.95 |
Please note: Actual colors and patterns may not be exactly as shown in photos. Some colors appear darker in thicker baits and more transparent in thinner baits. Baits with heavy salt may be less transparent than color samples shown. Each bait is hand poured to order one at a time and inspected for quality and appearance. Please allow additional time for large orders. All prices are in U.S. currency. Sorry, no international orders at this time.
Please email me at derek@pondbuster.com if you have any questions, have additional requests with a particular order, or if you have any problems with placing your order with PayPal.
![]()
 |
